A useful installation guide answers three questions: where should the user open the app, which browser control should they tap, and what should they see when they finish? Create separate instructions for iPhone with Safari and Android with Chrome, and use the same app name and icon your users already recognize.
A complete guide, before you buy.
Explore our fixed example: all eight steps, both platforms and the PNG format.
View the example →1. Prepare your app URL and branding
Use the public address your users should visit to install your app. Avoid dashboard links, invitation tokens and other private URLs. Confirm that installation works on your supported devices before creating the guide.
Have your app’s name and icon ready. InstallKit reads available website and manifest metadata; you can correct the detected values. If the site hides metadata behind a login or a bot challenge, automatic detection may not have enough information.
- A publicly reachable app URL.
- The app name your users should see on their Home Screen.
- A clear icon; separate iPhone and Android icons are supported.
- An optional accent color for the illustrated highlights.
This is an instructions workflow, not a PWA builder. If installation itself is failing, address that first. MDN’s installability guide explains the underlying platform requirements and differences.
2. Buy an Install-Kit and generate the steps
Create an account or sign in, then buy one Install-Kit for $9. One purchase covers one app and includes both platforms. Payment is required before your URL is analyzed or a personalized preview is generated.
Enter the app URL in the guide studio. InstallKit uses the available branding to fill four iPhone illustrations and four Android illustrations. If required information is missing, provide it before completing the guide.
You do not need to upload screenshots. The device, browser and installation dialogs are illustrated templates; the intended branding fields change to match your app.
3. Review your name, icons and highlights
Open Edit branding and check both platform previews. In particular, read long names at the size your users will see them, check that the icon is recognizable, and make sure the visible address contains no private parameters.
Branding corrections and regeneration for the same app are included for 30 days from guide creation. The editing window is not an unlimited license to generate guides for different apps: each additional app needs its own paid Install-Kit.
4. Download and share your PNGs
Download individual PNGs or the ZIP containing all eight images at 768 × 1280 pixels. Extract the ZIP, then upload the relevant images to your own website or help center. Your downloaded files remain yours to use after the editing window ends.
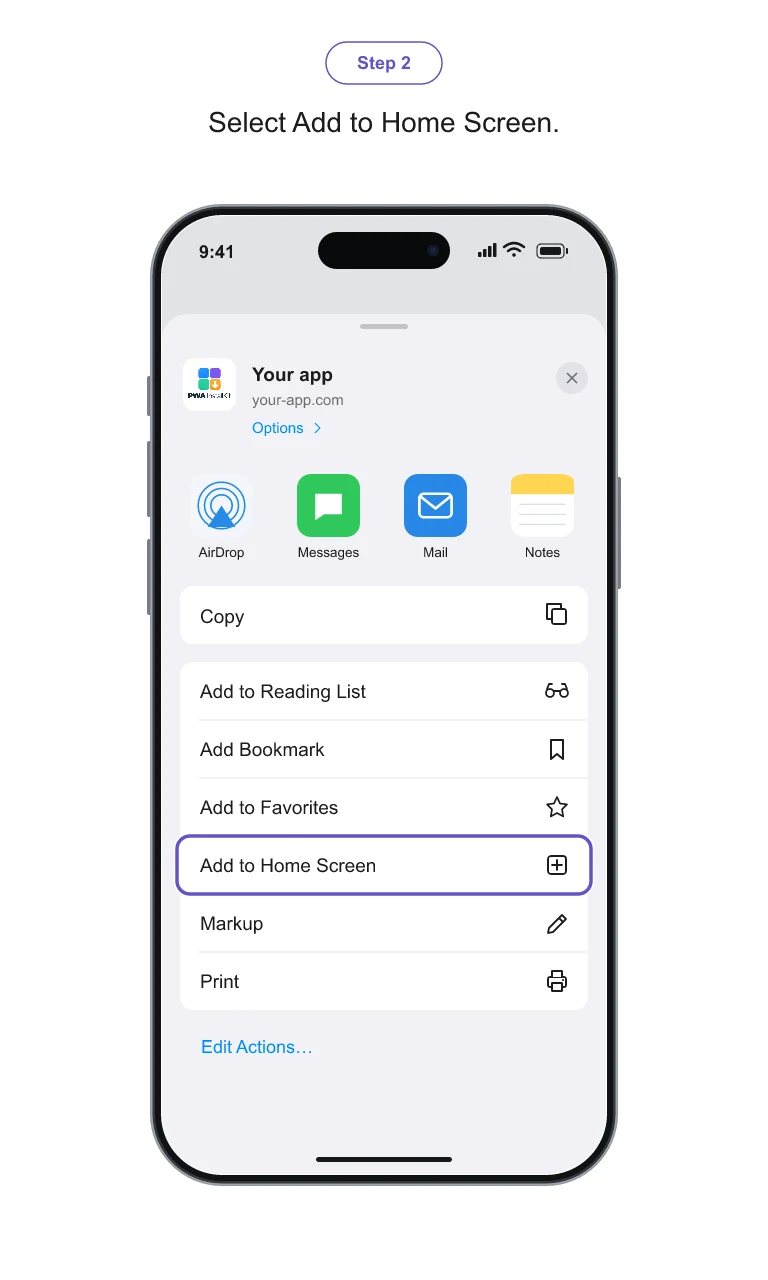
Give each platform its own heading and keep the steps in order. Include text descriptions outside the images and useful alternative text. The example below uses a file you have already downloaded and uploaded to your own site:
<figure>
  <img
    src="/images/iphone-step-2.png"
    width="768" height="1280"
    alt="Select Add to Home Screen in Safari"
    style="max-width: 100%; height: auto"
  />
  <figcaption>
    Step 2: Select Add to Home Screen.
  </figcaption>
</figure>
The image path is an example: replace it with your uploaded file’s path. For emails, use a public HTTPS image address. For a help-center editor, upload the PNG and enter the same description in its image and caption fields.
Host your exported files yourself instead of depending on temporary account download links. InstallKit provides PNG files, not a hosted installation page or an iframe service.
Manual screenshots, an install prompt or an Install-Kit?
| Approach | Choose it when | What you manage |
|---|---|---|
| Manual screenshots | You need to show a very specific device or interface. | Capture, anonymize, annotate and update each image yourself. |
| An installation library | You need a dialog or button inside your app. | Integration, browser behavior and testing in your codebase. |
| PWA InstallKit | You need branded, downloadable instructions for onboarding. | Review your branding and place the PNGs where your users need them. |
A guide can complement an in-app install prompt. It does not trigger installation or replace the underlying browser controls.
Before publishing your instructions
- Open the real app URL and complete installation on your supported iPhone and Android devices.
- Check browser version and layout. Safari’s Share control can be in different places depending on the selected layout.
- Confirm that the resulting Home Screen icon and app name match your guide.
- View your help page on a phone: the images and accompanying text should be readable without zooming.
- Keep a copy of your downloads. Editing and account downloads are available for 30 days from guide creation.
For the current Safari flow, refer to Apple’s Home Screen instructions. The guide images illustrate a template layout; they are not a certification of your app’s installability.
Ready to create your own?
Eight branded PNGs for one app. Both platforms. $9 once.